
10 Stunning Wall Art Ideas to Elevate Your Home Decor
Contents
Ever walked into a room and felt like something was missing? Like the walls were just… there? That’s where these 10 stunning wall art ideas come in. Wall art isn’t just about filling space; it’s about creating a vibe, telling a story, and making your home feel like you. Let’s dive deeper into each idea to help you transform your walls from blank to brilliant.
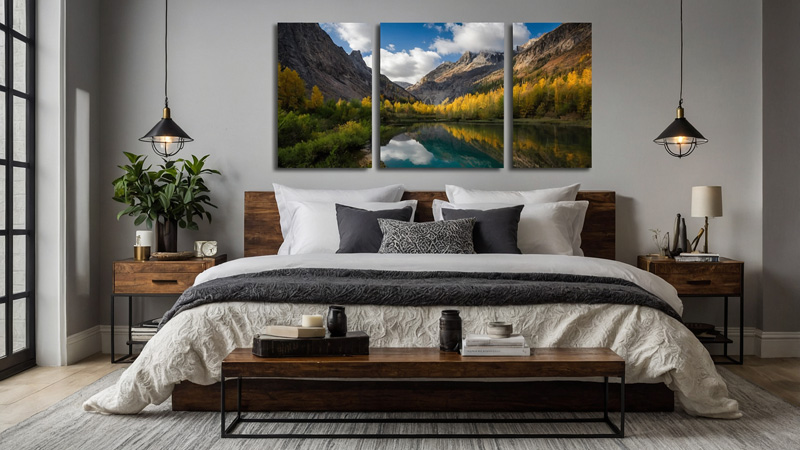
1. Start with a Statement Piece
A statement piece is the anchor of your room—it doesn’t just decorate; it defines the space. Think of it as the lead actor in a play: all eyes go to it, and it sets the mood for everything else. Whether you’re drawn to bold abstracts, intricate landscapes, or even an oversized vintage map, the right statement piece can turn a generic room into a space with personality.
How to choose the perfect statement piece:
- Size matters, but so does scale: For a large living room with high ceilings, an 8-foot-wide abstract painting or a 6-foot-tall metal sculpture can command attention without feeling cramped. In a smaller room (like a bedroom), opt for something slightly more modest—say, a 4-foot-diameter circular canvas or a 3-foot-tall mirror with a sculptural frame—to avoid overwhelming the space.
- Let your style shine: If you love mid-century modern design, a statement piece might be a large geometric print with clean lines and earthy tones (think terracotta, olive, and mustard). For boho lovers, an oversized macramé wall hanging with tassels and fringe adds texture and warmth. Minimalists? A sleek black-and-white photograph of a cityscape or a single, bold color block (like a deep sapphire or burnt orange) works wonders.
- Lighting plays a role: A statement piece in a dimly lit room (like a basement den) should have bright, contrasting colors to draw the eye—think a neon-inspired acrylic painting or a mirror with LED backlighting. In sunlit rooms, softer hues (muted pastels, warm neutrals) prevent the piece from clashing with natural light.
- Placement is key: The sweet spot for hanging? Eye level, which is roughly 57–60 inches from the floor to the center of the piece. If you’re hanging it above furniture (like a sofa or bed), make sure it’s 6–12 inches above the furniture’s top edge to create a cohesive look.
2. Mix and Match Styles
Why box yourself into one design aesthetic? Mixing styles adds layers of interest and tells a more dynamic story. A vintage poster next to a modern print, a rustic wooden sign paired with a sleek metal sculpture—these combinations feel curated, not chaotic, when done right.
Pro tips for mixing styles:
- Stick to a color story: Even if the styles clash, a shared color palette ties them together. For example, pair a 1950s retro floral print (with pops of coral and mint) with a contemporary abstract painting that uses the same coral and mint in bold, geometric shapes. The colors create a bridge between the old and new.
- Play with texture contrasts: Combine smooth and rough, shiny and matte. A glossy, frameless digital print looks striking next to a hand-knitted wall hanging or a weathered wooden plaque. The contrast adds depth—your eyes will move from one texture to the next, keeping the wall feeling alive.
- Balance “busyness”: If you’re mixing a busy pattern (like a Baroque-inspired tapestry with intricate gold details) with a simpler piece (like a minimalist black line drawing), let the busy piece take up more visual weight. This prevents the wall from feeling cluttered—one star, one supporting actor.
- Frame thoughtfully: Mixing frame styles can amplify the eclectic vibe. Try a brass ornate frame (vintage) with a thin black metal frame (modern) or a rattan frame (boho) with a sleek acrylic frame (contemporary). Just avoid mixing more than 3 frame materials—any more, and it might feel messy.
3. Create a Gallery Wall
Gallery walls are timeless because they’re personal. They let you blend family photos, travel souvenirs, favorite prints, and even 3D objects into a single, cohesive display. Whether you go for a tight grid or a more organic arrangement, a gallery wall feels like a visual diary.
Step-by-step to building the perfect gallery wall:
- Plan the layout first: Lay all your pieces on the floor (or use painter’s tape on the wall to map out sizes) before hanging. This lets you experiment without holes in the wall. Popular layouts include:
- Symmetric grid: Uniform frames (same size, same color) arranged in straight lines—great for minimalist or modern spaces.
- Salon-style: A mix of sizes and shapes, with larger pieces at the bottom/center and smaller ones radiating out—feels lively and curated, like an art gallery.
- Asymmetric cluster: A loose grouping with a focal point (e.g., a large family portrait) and smaller pieces around it—perfect for cozy spaces like hallways or bedrooms.
- Mix media for depth: Don’t limit yourself to prints and photos. Add a small woven tapestry, a vintage keychain collection under glass, or even a tiny ceramic plate with a hand-painted design. These 3D elements make the wall feel tactile and unique.
- Stick to a theme (or not): A gallery wall can tell a story—say, all travel photos from your adventures, or all art featuring your favorite flower. But it can also be eclectic: a concert poster next to a child’s drawing next to a vintage postcard. If you go theme-less, use a unifying element (like all black frames or a shared color) to tie it together.
- Leave breathing room: Aim for 2–4 inches between pieces. Too much space, and it feels disconnected; too little, and it looks crowded.
4. Use Wall Decals for a Quick Refresh
Wall decals are a renter’s dream and a decor lover’s secret weapon. They’re affordable, removable, and customizable—perfect if you like switching up your space without commitment. From bold murals to subtle quotes, decals let you experiment without permanent changes.
Why decals work (and how to use them):
- Choose the right material: Vinyl decals are durable and waterproof (great for bathrooms or kitchens), while fabric decals feel softer and are easier to reposition. For textured walls (like stucco), opt for thicker decals—they’ll adhere better.
- Size matters: A small decal (like a quote above a desk) adds a subtle touch, while a large mural (e.g., a forest scene or abstract waves) can transform an entire wall. In a small room, stick to vertical decals (like tall trees or thin lines) to make ceilings feel higher.
- DIY your own: For a truly unique look, create custom decals. Use a vinyl cutter (or order from a custom shop) to make decals of your child’s handwriting, a meaningful date, or even a simplified version of your favorite painting.
- Remove with care: To avoid damaging walls, peel decals slowly at a 45-degree angle. If they’re stubborn, heat them with a hair dryer on low—this softens the adhesive for easier removal.
5. Incorporate Textured Art
Texture adds “feel” to your walls—literally. A woven tapestry, a macramé hanging, or a 3D metal sculpture doesn’t just look good; it invites touch and creates depth. Textured art is especially great for rooms that feel flat or lacking warmth.
How to use texture to elevate your space:
- Layer textures for contrast: Pair a smooth, shiny piece (like a glass mosaic wall hanging) with a rough, natural one (like a jute rug hung on the wall). The contrast makes both pieces stand out. In a minimalist room, a single textured piece (e.g., a chunky knit wall hanging) adds warmth without cluttering.
- Choose materials that fit your climate: In humid spaces (like bathrooms), opt for moisture-resistant textures—think metal, plastic, or sealed wood. In dry climates, fabric-based textures (wool, cotton) add coziness without drying out the air.
- Let light highlight texture: Position textured art near a window or under a directional light. Sunlight or spotlights will cast shadows on the texture, making it look more dynamic. For example, a macramé hanging in front of a window creates beautiful shadow patterns on the floor throughout the day.
- Scale texture to the room: A large, fluffy shag rug hung as wall art works in a spacious living room, but in a small bedroom, a delicate lace wall hanging or a thin metal wire sculpture (with negative space) is better—too much texture can make a small room feel cramped.
6. Go Big with Murals
Murals are bold, immersive, and transformative. They turn a wall into a work of art, whether you opt for a hand-painted scene, a removable wallpaper mural, or even a digital print. A well-done mural can make a room feel larger, brighter, or more serene—all at once.
Tips for nailing a mural:
- Pick the right wall: Murals work best on walls that are visible but not cluttered (e.g., behind a sofa, above a bed, or in a home office). Avoid walls with lots of windows or doors—they’ll break up the mural’s flow.
- Match the room’s purpose: A bedroom mural should promote relaxation—think soft watercolor landscapes, starry skies, or muted floral patterns. A playroom can handle something vibrant: a jungle scene with animals, or a rainbow gradient. A home office might benefit from a minimalist mural (e.g., a single color wash with subtle brushstrokes) to boost focus.
- DIY or hire a pro?: Removable wallpaper murals are perfect for beginners—they’re easy to install and remove. For a custom look, hire a local artist to paint directly on the wall. Discuss your vision (colors, theme, style) and ask for a sketch first to ensure it aligns with your space.
- Balance with decor: A bold mural doesn’t need much else. Keep furniture and other decor simple—neutral sofas, minimal shelves—to let the mural be the star. If the mural is subtle (e.g., a soft abstract pattern), you can layer in more colorful accents.
7. Add Lighting to Highlight Your Art
Great art deserves great lighting. The right fixtures can make colors pop, textures stand out, and turn a simple print into a focal point. Lighting isn’t just functional—it’s part of the art’s story.
Lighting techniques for wall art:
- Choose the right fixtures:
- Picture lights: Mounted directly above or below a piece, these cast a focused beam—ideal for highlighting paintings or framed photos. Opt for adjustable ones so you can angle the light to avoid glare.
- Track lighting: Perfect for gallery walls or multiple pieces. You can move the lights to focus on different artworks as you rearrange.
- LED strips: Hide them behind a floating shelf or along the edge of a large canvas for a subtle, modern glow. Great for abstract art or sculptures.
- Mind the color temperature: Warm light (2700K–3000K) brings out reds, oranges, and yellows—great for oil paintings or cozy spaces. Cool light (4000K–5000K) enhances blues, greens, and grays—perfect for modern photography or minimalist art.
- Avoid common mistakes: Don’t place lights too close to the art (they’ll create harsh shadows) or too far (the art will look dim). For a 2-foot-wide piece, the light should be 6–12 inches away from the frame. Also, never use direct sunlight—UV rays can fade paint and fabric over time.
- Smart lighting for versatility: Use smart bulbs that change color or brightness with your phone. Dim the lights for a cozy evening, or crank up the brightness to admire the art’s details during the day.
8. Think Outside the Frame
Wall art doesn’t have to be a print in a frame. Unconventional pieces—from functional objects to nature-inspired decor—add personality and surprise. They make your walls feel like you, not a catalog.
Creative ideas to try:
- Functional art: Turn everyday items into decor. A vintage ladder leaned against the wall (with blankets or small plants hanging from it), a set of colorful cutting boards mounted in a grid, or a collection of antique keys arranged in a shape (like a heart or star). These pieces are useful and beautiful.
- Nature-inspired: Bring the outdoors in with wall-mounted planters (succulents, pothos, or air plants), a preserved moss wall (low-maintenance and lush), or a driftwood sculpture. These add life and freshness to any room.
- Hobby displays: Show off what you love. A musician might hang a collection of vintage guitars or vinyl records (framed album covers look great!). A book lover could mount a shelf with their favorite hardcovers, spines out. A crafter might display a wall of handmade quilts or knit scarves.
- Upcycled art: Give old items new life. An old window frame with panes replaced by family photos, a rusted metal sign repainted with a meaningful quote, or a stack of vintage suitcases mounted as shelves. Upcycled pieces add character and sustainability.
9. Play with Scale and Proportion
Size matters—too small, and art gets lost; too large, and it overwhelms. Getting scale right ensures your wall art feels balanced with the room and furniture.
How to master scale:
- Measure, measure, measure: Before buying, measure the wall and any nearby furniture. A general rule: art above a sofa should be 2/3 to 3/4 the width of the sofa. For a wall with no furniture (like a hallway), the art should take up 50–75% of the wall’s width—leaving enough space to breathe.
- Use the “rule of thirds”: Divide the wall into three vertical sections. The art should sit in the middle third (eye level) for the most natural viewing. For tall walls (9+ feet), extend the art into the upper third to draw the eye up, making the room feel taller.
- Layer small pieces to fill space: If you love small art but have a large wall, group them. A cluster of 5–7 small frames (all similar in style) can fill the space like one large piece. Arrange them tightly (1–2 inches apart) so they read as a single unit.
- Contrast with furniture height: A low sofa pairs well with a tall, narrow piece of art (it balances the horizontal sofa with verticality). A high bookshelf looks great with a wide, short piece above it (echoing the shelf’s width).
10. Personalise It
Your home should feel like you—and personalized wall art is the best way to do that. Custom pieces, DIY projects, and mementos turn walls into storytellers, making your space feel irreplaceable.
Ways to add personal touches:
- Custom commissions: Hire an artist to create something one-of-a-kind. A portrait of your pet in watercolor, a landscape of your favorite childhood spot, or even an abstract piece inspired by your wedding colors. These pieces are conversation starters and hold emotional value.
- DIY projects: Get creative with handmade art. Paint a canvas with your favorite quote (use stencils for neat lettering), collages of ticket stubs from concerts or trips, or a “family handprint tree” (everyone dips their hand in paint and presses it on the canvas). DIY art doesn’t have to be perfect—it’s the effort that counts.
- Memory displays: Turn mementos into art. Frame your child’s first drawing, a dried bouquet from your wedding, or a map with pins marking all the places you’ve lived. For a subtler touch, scan old photos (like your grandparents’ wedding photo) and print them on canvas—modern meets nostalgic.
- Name art: Personalize with names or dates. A wooden sign with your family name and the year you moved in, a neon sign with your child’s nickname, or a canvas with your favorite quote and the date you first heard it. These small details make the space feel uniquely yours.
Conclusion
Your walls are a blank canvas waiting to reflect who you are. Whether you go bold with a statement mural, cozy with a gallery wall of family photos, or creative with upcycled art, the goal is to make your home feel like you. These 10 ideas are just starting points—mix, match, and experiment until your walls tell your story. After all, the best decor isn’t about trends; it’s about feeling at home. So grab a hammer, some art, and start creating. Your walls (and you) will thank you.
 Home Decor Ideas to Make Your Home Feel Like a Luxury Hotel
 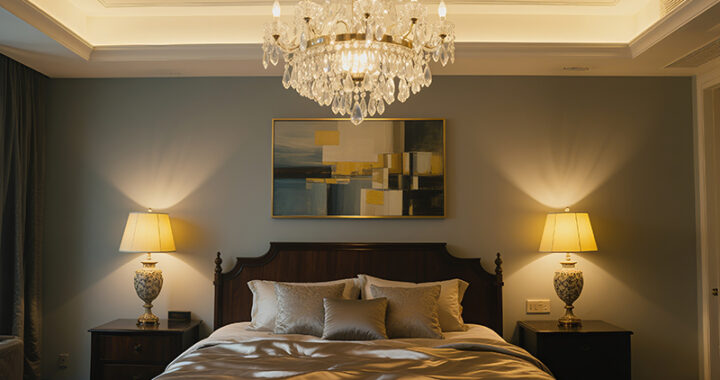 Best Luxury Accent Lighting for Every Room
  Best Luxury Candles for a Cozy and Elegant Home
  Best Luxury Bed Frames for a Stylish Bedroom
 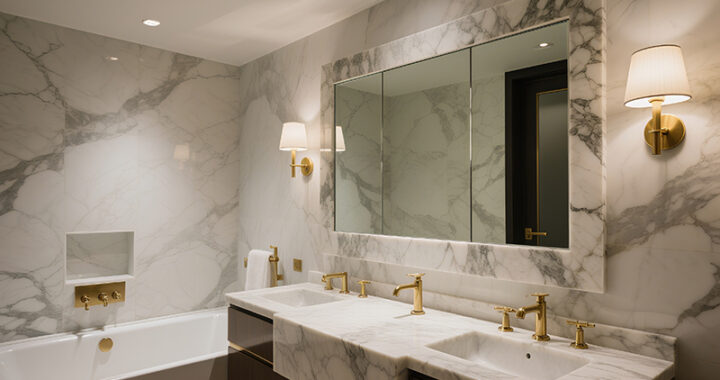 Best Luxury Bathroom Mirrors for a Stylish Touch
 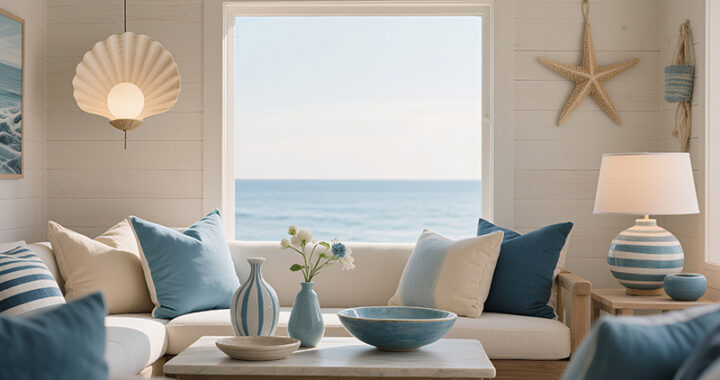 Luxury Coastal Home Decor Ideas: Elevate Your Beach House with Timeless Elegance