
Spring-Inspired Decor Ideas for Your Home’s Walls
Contents
- Introduction
- Overview
- 1. Start with a Fresh Coat of Paint
- 2. Bring Nature Indoors with Botanical Prints
- 3. Create a Gallery Wall
- 4. Add Texture with Wall Hangings
- DIY Wall Hanging Project
- 5. Incorporate Mirrors for Light and Space
- 6. Use Wall Decals for a Temporary Update
- 7. Hang Floating Shelves for Function and Style
- 8. Experiment with Wallpaper
- 9. Add a Statement Clock
- 10. Personalise with DIY Art
- Conclusion
Introduction
Spring is a season of renewal—buds burst, flowers bloom, and the world shakes off the quiet of winter. It’s also the ideal time to breathe new life into your home, starting with the walls. Often overlooked, walls are a blank canvas waiting to reflect the vibrancy, warmth, and freshness of spring. Whether you prefer soft pastels, natural textures, or playful patterns, updating your walls can transform a space from dull to delightful. This guide offers 10 detailed, actionable ideas to infuse your home with spring’s essence, proving that a little creativity (and minimal effort) can make a big difference.
Overview
These spring-inspired wall decor ideas blend functionality, style, and seasonality, catering to every taste and budget. From quick, temporary updates to more permanent transformations, each tip is designed to bring light, color, and a touch of nature indoors. Whether you’re a renter seeking temporary solutions, a DIY enthusiast, or someone who prefers curated elegance, you’ll find ideas to make your walls feel like a celebration of spring.
1. Start with a Fresh Coat of Paint
A new layer of paint is the simplest way to reset your space for spring. Light, airy hues mimic the season’s softness, while strategic techniques can add depth without overwhelming the room.
Color Palette Recommendations
- Pastel pinks (think cherry blossom tones) for bedrooms—create a calming, romantic vibe.
- Soft blues (like sky or robin’s egg) for bathrooms or kitchens—evoke freshness and cleanliness.
- Mint greens or pale yellows (buttercream) for living rooms—boost energy and warmth.
- Neutral bases (ivory, soft gray) with spring accents (e.g., a pale lavender stripe) for versatility.
Finish & Application Tips
- Matte finishes work best for low-traffic areas (bedrooms) to hide imperfections.
- Satin finishes are ideal for high-moisture spaces (bathrooms) as they resist mildew.
- Prep walls first: Clean with mild soap, patch holes with spackle, and sand for a smooth base.
Budget-Saving Strategies
- Paint one accent wall (e.g., behind the sofa) in a bolder shade (like coral) to save on paint.
- Try a “color block” effect: Paint geometric shapes (circles, triangles) in spring hues for a playful twist—no need to cover the entire wall.
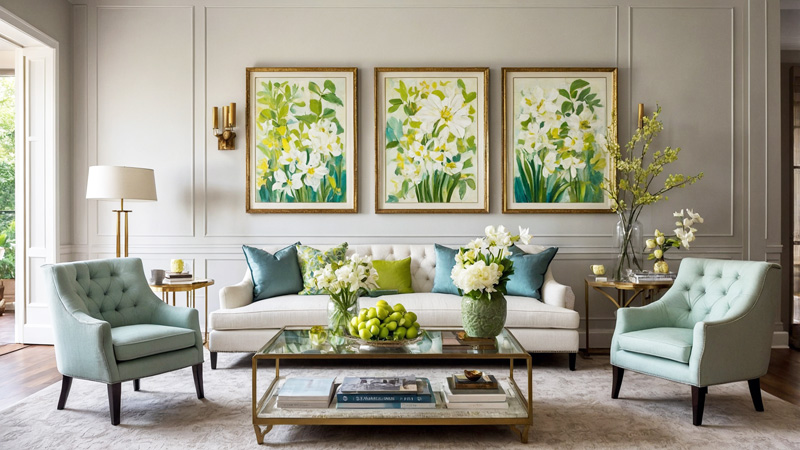
2. Bring Nature Indoors with Botanical Prints
Botanical art bridges the gap between indoors and outdoors, making it a timeless spring choice. From delicate wildflowers to lush ferns, these prints add life without the upkeep of real plants.
Print Selection Guide
- Vintage-style illustrations (think 19th-century botany books) for a classic, sophisticated look.
- Watercolor florals (roses, peonies) for a soft, romantic feel—perfect for bedrooms.
- Tropical leaves (monstera, palm) for a bold, modern touch—great for living rooms or home offices.
Styling & Framing
- Mix frame materials: Pair rattan frames with wooden ones for a boho-chic vibe, or gold metal frames with white mats for elegance.
- Arrange in sets: Hang three identical prints in a row (vertical or horizontal) for symmetry, or cluster 5–7 small prints in varying sizes for an eclectic look.
- Skip frames entirely: Mount prints on canvas or linen for a minimalist, contemporary feel.
DIY Botanical Art Ideas
- Press fresh spring flowers (daisies, pansies) between heavy books for 1–2 weeks, then frame them with acid-free paper to preserve color.
- Take photos of your garden blooms, print them in black and white, and add hand-drawn watercolor accents (green stems, yellow centers) for a personal touch.
3. Create a Gallery Wall
A gallery wall tells a story—yours. By combining photos, art, and decor, you can craft a space that feels uniquely yours, with spring as the backdrop.
Layout & Design Tips
- Grid pattern: Use equal spacing (2–3 inches) between frames for a polished, modern look—ideal for symmetric spaces like hallways.
- Asymmetrical layout: Mix large and small pieces, overlapping slightly, for a relaxed, curated vibe. Start by arranging items on the floor to test the flow.
- Themed focus: Center the gallery around a spring motif, such as family photos from past spring vacations, or art featuring blooming trees.
Must-Include Elements
- A mix of media: Combine printed photos, canvas art, and even small textiles (like a woven patch or embroidered flower).
- Mirrors: Tuck a small round mirror into the gallery to reflect light and add depth.
- 3D elements: Hang a small macramé plant hanger or a ceramic bird sculpture to break up flat surfaces.
Hanging Hacks
- Use removable adhesive strips instead of nails to avoid wall damage—great for renters.
- Mark positions with painter’s tape before hanging to ensure alignment.
4. Add Texture with Wall Hangings
Textured wall hangings (macramé, woven tapestries, or knitted pieces) add warmth and dimension, turning plain walls into cozy focal points—perfect for spring’s transition from cool to warm.
Material & Style Options
- Macramé: Knotted cotton or jute designs (think fringed or leaf-shaped) for a bohemian, relaxed feel.
- Woven tapestries: Wool or cotton blends with floral patterns or abstract spring colors (pastel stripes) for texture.
- Crocheted wall art: Delicate doilies or flower-shaped pieces for a vintage, cottage-like vibe.
Placement & Pairing
- Above the bed: A large macramé piece (3–4 feet wide) adds softness without overwhelming the space.
- In a reading nook: Hang a small woven tapestry behind a chair, paired with string lights for a cozy atmosphere.
- Pair with plants: Hang a wall hanging near a potted fern or ivy to enhance the natural theme.
DIY Wall Hanging Project
- Make a simple woven wall hanging: Use a wooden dowel as a base, then weave cotton yarn in spring colors (mint, blush) using basic over-under patterns. Add fringes by cutting yarn into equal lengths and tying them to the dowel.
5. Incorporate Mirrors for Light and Space
Mirrors are spring’s secret weapon—they amplify natural light, making rooms feel brighter and more spacious, which is key after dark winter months.
Mirror Styles for Spring
- Rattan-framed mirrors: Add a beachy, laid-back vibe—perfect for entryways or bathrooms.
- Painted wooden frames: Choose soft pastels (light blue, lavender) or hand-paint floral details for a custom touch.
- Frameless or minimal metal frames: Sleek and modern, these work well in contemporary spaces.
Strategic Placement
- Opposite a window: Reflects sunlight across the room—ideal for north-facing rooms that get little natural light.
- Above a console table: A long, rectangular mirror here can make a narrow hallway feel wider.
- Group small mirrors: Arrange 3–5 round mirrors in varying sizes on a wall for a “bubbly” spring look—resembling raindrops or flower blooms.
Pro Tips
- Clean mirrors with vinegar and water to avoid streaks—clear reflections make the room feel more open.
- Lean a large mirror against a wall (instead of hanging) for a casual, layered look—great for bedrooms or living rooms.
6. Use Wall Decals for a Temporary Update
Wall decals are perfect for renters or anyone who loves changing their decor. They’re affordable, easy to apply, and come in endless spring designs.
Design Ideas for Spring
- Floral patterns: Vines, cherry blossoms, or daisies—great for kids’ rooms or nurseries.
- Nature motifs: Butterflies, birds, or bees for a whimsical touch—ideal for playrooms.
- Inspirational quotes: Phrases like “Bloom where you’re planted” or “Spring is a new beginning” in soft, cursive fonts.
Application & Maintenance
- Apply to smooth, clean walls: Wipe with a dry cloth to remove dust—avoid applying to textured or recently painted walls (wait 2–3 weeks for paint to cure).
- Reposition carefully: Most decals are reusable—peel gently and adjust before pressing firmly.
- Protect from direct sunlight: UV rays can fade decals, so avoid placing them near unshaded windows.
Creative Ways to Use Decals
- Frame a decal: Apply a small floral decal to a plain canvas, then frame it for instant art.
- Accent furniture: Use decals on bookshelves or the back of a closet door for a hidden pop of spring.
7. Hang Floating Shelves for Function and Style
Floating shelves are both practical and decorative—they display spring essentials (plants, small art) while keeping surfaces clutter-free.
Shelf Materials & Styles
- Wooden shelves: Light oak or whitewashed wood adds warmth—great for a rustic or cottage look.
- Metal shelves: Sleek black or brass finishes for a modern, industrial edge—pair with minimalist decor.
- Acrylic shelves: Transparent and lightweight, these create a “floating” illusion—perfect for small spaces.
Styling Your Shelves for Spring
- Layer heights: Place taller items (like a small potted snake plant) behind shorter ones (a stack of spring-themed books) for depth.
- Add color: Display ceramic vases in pastels, or fill small bowls with pastel-colored stones or artificial flower petals.
- Rotate seasonally: Swap winter decor (pinecones, candles) for spring items (miniature birdhouses, fresh herbs in pots).
Installation Tips
- Use wall anchors: Ensure shelves can hold weight (especially if displaying plants or heavy decor).
- Space evenly: For multiple shelves, use a level to align them—3–4 inches between shelves works for most spaces.
8. Experiment with Wallpaper
Wallpaper has evolved—gone are the days of permanent, hard-to-remove designs. Today’s options are easy to apply, removable, and full of spring spirit.
Pattern Trends for Spring
- Micro-florals: Tiny, delicate flowers (like forget-me-nots) in soft colors—subtle enough for entire rooms.
- Watercolor washes: Blended pastels (pink, blue, green) for a dreamy, ethereal look—great for bedrooms.
- Geometric patterns: Circles or hexagons in spring hues—adds modernity without being too bold.
Application & Removal
- Peel-and-stick wallpaper: Ideal for renters—no paste needed, and it comes off cleanly without damaging walls.
- Traditional wallpaper: Use in small doses (e.g., a half-wall, with paint above) to reduce commitment.
- Prep walls: Ensure they’re smooth and dry—textured walls can cause bubbles.
Unexpected Places to Use Wallpaper
- Inside cabinets: Line the back of kitchen or bathroom cabinets with floral wallpaper for a surprise pop of color when opened.
- Stair risers: Apply wallpaper to stair steps for a fun, unexpected detail—just seal with clear varnish to protect from wear.
9. Add a Statement Clock
A statement clock does double duty: It keeps time and acts as a focal point. Choose a design that embodies spring’s energy—think bright colors, natural materials, or floral motifs.
Clock Designs for Spring
- Wooden clocks with laser-cut floral patterns: The intricate designs cast beautiful shadows when light hits them.
- Oversized sunburst clocks: Gold or brass rays mimic sunshine—perfect for dark corners needing a lift.
- Vintage-inspired clocks: Pastel-colored faces with floral numbers (e.g., a rose instead of “3”) for a charming, nostalgic feel.
Placement Guidelines
- Above the mantel: A medium-sized clock (18–24 inches) here anchors the space and draws the eye.
- In the kitchen: A large clock (24+ inches) is both functional and decorative—pair with matching kitchen towels in coordinating colors.
- In home offices: A minimalist clock with a spring-colored frame (mint, pale yellow) adds personality without distraction.
DIY Clock Makeover
- Upcycle an old clock: Paint the frame in a spring color, replace the face with a botanical print, and add new hands for a custom piece.
10. Personalise with DIY Art
DIY art adds soul to your walls—each piece tells a story, making your home feel truly unique. Spring is the perfect season to get creative, using nature as inspiration.
Easy DIY Projects
- “Pressed Flower Canvas”: Arrange pressed spring flowers (daisies, tulips) on a canvas, then seal with mod podge for a preserved, textured piece.
- “Nature Collage”: Glue twigs, leaves, and small stones onto a wooden board—paint the background in a soft green for cohesion.
- “Hand-Lettered Quote Board”: Use acrylic paint to write your favorite spring quote (e.g., “April showers bring May flowers”) on a reclaimed wood plank.
Materials & Tools
- Reuse items: Old canvases, cardboard boxes (cut and painted), or glass jars (for shadow boxes) reduce waste.
- Basic supplies: Acrylic paints, paintbrushes, scissors, glue, and string (for hanging) are all you need.
Display Tips
- Mix DIY art with store-bought pieces: Balance homemade charm with polished prints for a curated look.
- Hang at eye level: Most art looks best 57–60 inches from the floor—adjust for taller ceilings.
Conclusion
Spring wall decor is about embracing light, nature, and renewal. Whether you opt for a fresh coat of paint, botanical prints, or a gallery wall of DIY art, the goal is to create a space that feels like a reflection of the season—bright, inviting, and full of life. These 10 ideas are flexible enough to fit any style or budget, proving that transforming your walls doesn’t require expertise or expense—just a little creativity. So grab your paintbrush, gather some flowers, and let your walls bloom this spring.
 Home Decor Ideas to Make Your Home Feel Like a Luxury Hotel
  Best Luxury Accent Lighting for Every Room
  Best Luxury Candles for a Cozy and Elegant Home
  Best Luxury Bed Frames for a Stylish Bedroom
 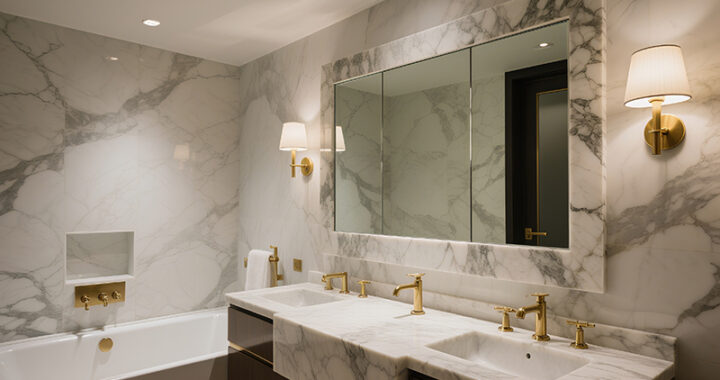 Best Luxury Bathroom Mirrors for a Stylish Touch
 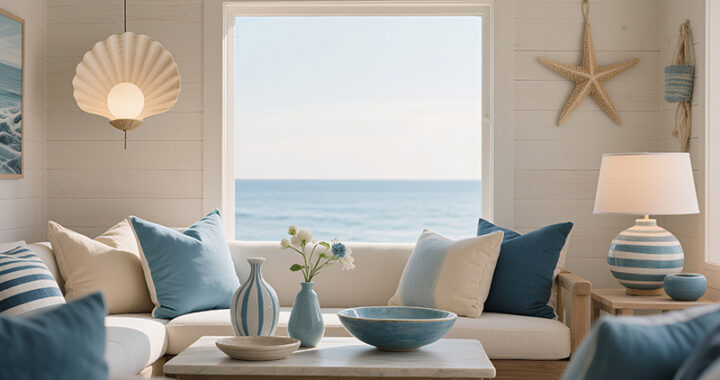 Luxury Coastal Home Decor Ideas: Elevate Your Beach House with Timeless Elegance